Bulk Update
Overview
The Bulk Update feature is used to make updates and edits to selected System fields of any number of systems at a time.
To update systems using the Bulk Update feature: -
The Bulk Update feature can be found on the System Details page of the DataMap module\
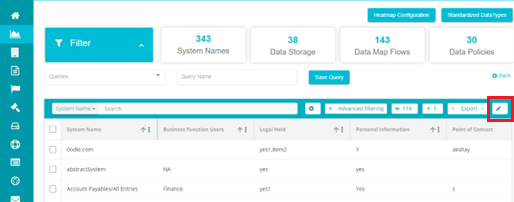
Search for the Systems you want to update\

Bulk Updates can also be made to the selected results of the Search or Filtering feature.
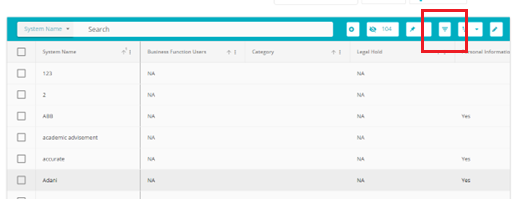
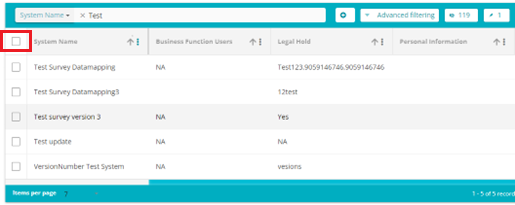
To filter systems, click on the filter button\
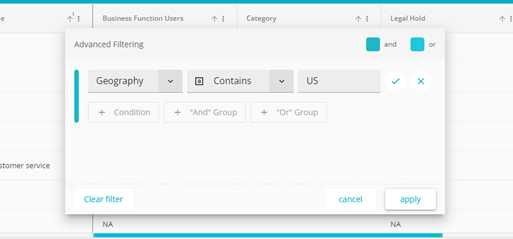
From the pop-up box that opens, enter your filter configuration\
 \
\
The above filter has been configured to obtain all the systems that
have US as the value in the Geography field. Additional filters can
further be applied\
\
\
The above filter has been configured to obtain all the systems that
have US as the value in the Geography field. Additional filters can
further be applied\
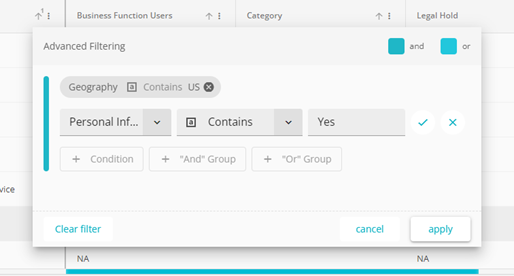 \
Now the configuration will filter the results further and only
provide the systems with US as the value in the Geography field and
which have the value Yes in the Personal Information field. In a
similar way, the systems can be filtered to bring the desired
results.
\
Now the configuration will filter the results further and only
provide the systems with US as the value in the Geography field and
which have the value Yes in the Personal Information field. In a
similar way, the systems can be filtered to bring the desired
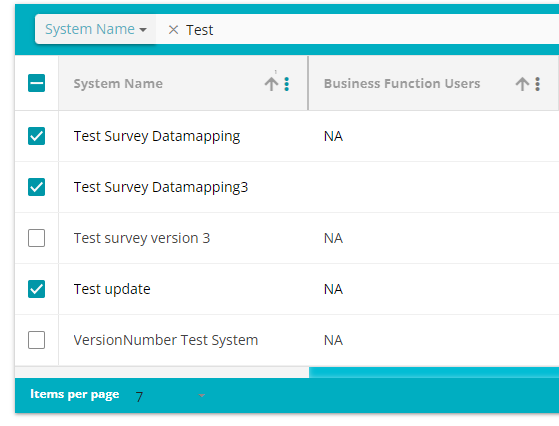
results.Once the results are available, click on the check box on the right of System Name\
On doing so, a tick will appear beside each system on the grid. Deselect the systems you don't want updated. In the below example, the bulk updates will not apply to Systems -- Test survey version 3 and Version Number Test System as both have been deselected.\
Next, once the required systems have been selected, click on the Bulk Update Button\
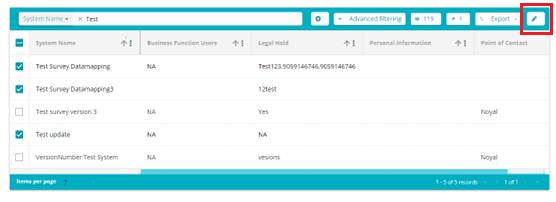
The Bulk Update pop-up will appear
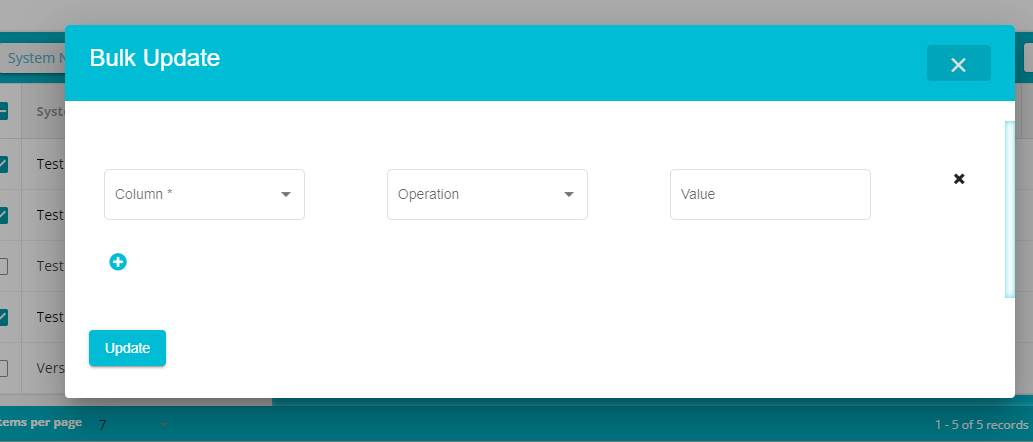
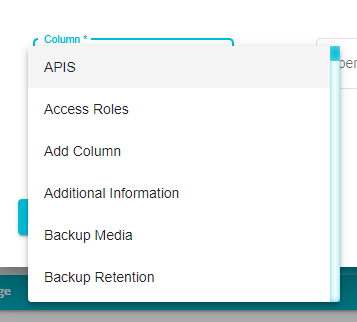
Here, from the Column drop-down, select the Column you want edited/updated\
Next, from the drop-down, select the operation you want performed on the field\

Replace All: This operation will replace the entire current value in the field with the value of your choice
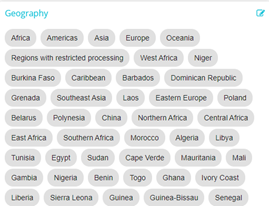
Replace Term: This operation is used only for multi-entry fields. Use this operation to replace any one term in a multi-entry field. An example of multi-entry field is given below\
Replace Phrase: This operation is used only for text fields. Use this operation to replace any one value in a text field. An example of a text field is given below\

Append: This operation is used to add a value to the end of an existing value
On clicking Replace Phrase or Replace Term, a new field will appear. Here, you can enter the term/phrase that you want replaced\

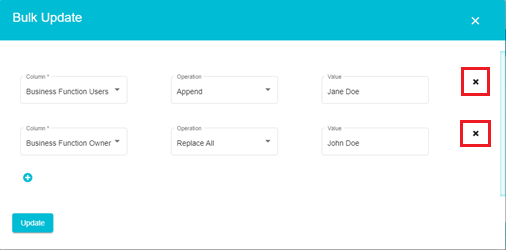
Finally, enter the new value for the field\ In the example below, the value John Doe from the Business Function Owner field of the selected systems will be replaced with the value Jane Doe\

In the example below, the Business Function Users fields of the selected systems will have the value Jane Doe appended to it\

Note: At a time, only one value can be updated/edited to a field
To add a new update/edit, click on the plus button\

To remove any update/edit, click on the X button corresponding to that edit\
Once all the edits have been made, click on the Update button\

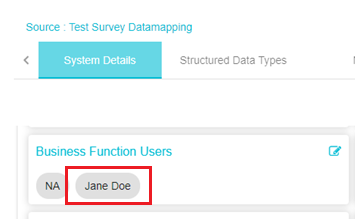
The changes will now be visible on the respective fields of the DataMap Systems\
Note: Only those fields that can be edited from the System details page can be updated using the Bulk Edit feature